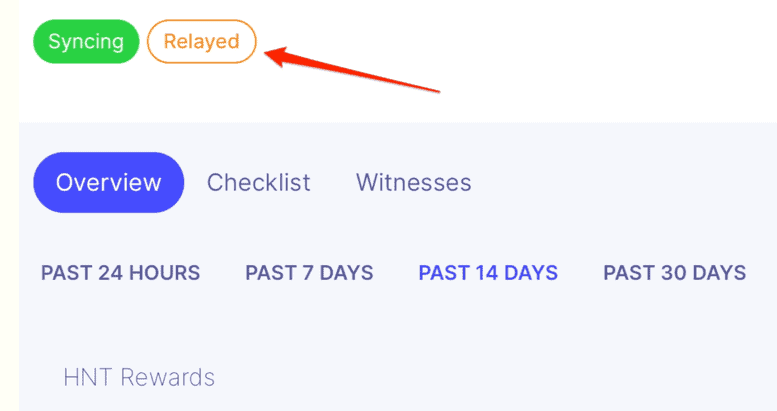
Opening a port on your Router is a common requirement when using specific applications or services that require external access. This article will explore the steps to open port 44158 on your Router using port forwarding.
Why do you need to open a port?
Ports are like doors on a computer or networked device. Each port is an entry point for data to enter or leave a machine. Therefore, when you want to access a service or application, such as a web server, file transfer protocol (FTP) server, or gaming server, you need to connect to a specific port on that server. By default, most routers block incoming traffic on all ports except for a few used for commonly used services like web browsing or email. Therefore, if you want to access a specific port on your device, you must open that port on your Router.
What is port forwarding?
Port forwarding is a technique that allows external devices to access a specific port on a machine located behind a router. For example, when a router receives data from the internet, it needs to know which device on its network should receive that data. Port forwarding enables the Router to route the incoming traffic to the appropriate device on its network.

How do you open Port 44158 on the Router on the Helium Hotspot?
- Step 1: Determine your Router’s IP address. To begin, you need to know your Router’s IP address. To find this information, open a Command Prompt or Terminal window on your computer, type “ipconfig” or “ifconfig,” and press Enter. Look for the “Default Gateway” IP address, usually your Router’s IP address.
- Step 2: Access your Router’s web interface. Once you have your Router’s IP address, open a web browser and enter it into the address bar. Press Enter to see your Router’s web interface login screen.
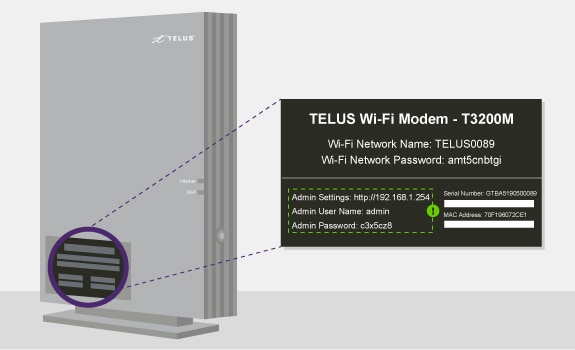
- Step 3: Log in to your Router. Enter your Router’s username and password to log in to the Router’s web interface. If you have not changed the default login credentials, you can find them in the documentation that came with your Router or by searching online for your Router’s make and model.
- Step 4: Navigate to the port forwarding section. The location of the port forwarding settings may vary depending on your Router’s make and model. Typically, it will be under the “Advanced Settings” or “Firewall” sections. Look for the “Port Forwarding” or “Virtual Server” option.
- Step 5: Add a new port forwarding rule. Click the “Add” button or the “+” symbol to add a new port forwarding rule. Enter a name for the rule, such as “44158,” in the “Name” field.
- Step 6: Enter the device’s IP address to which you want to forward the port. In the “Internal IP Address” or “LAN IP” field, enter the IP address of the device on your network to which you want to forward the port. This may be a computer or a networked device to which you want to allow traffic.
- Step 7: Enter the port number. In the “External Port” and “Internal Port” fields, enter “44158” to specify that you want to forward traffic on that port.
- Step 8: Choose the protocol. Select the protocol that you want to use, either “TCP,” “UDP,” or “Both.” The protocol you choose depends on the application or service you are trying to use.
- Step 9: Save the changes. Once you have entered all the necessary information, click the “Save” or “Apply” button to save your changes.
- Step 10: Test
How do we Open Port 44158 on the Router using port forwarding?
Here are the steps to open port 44158 on your Router using port forwarding:
- Determine your Router’s IP address: To do this, open the Command Prompt or Terminal on your computer, type “ipconfig” or “ifconfig,” and press Enter. Look for the “Default Gateway” IP address, which is typically your Router’s IP address.
- Open your Router’s web interface: Open your preferred web browser and enter the IP address you found in Step 1 into the address bar. This should take you to your Router’s web interface.
- Login to your Router: Enter your username and password to log in to your Router. If you have never changed the default login credentials, you can find them in the documentation provided with your Router or by searching online for your Router’s make and model.
- Navigate to the port forwarding section: The location of the port forwarding settings may vary depending on your Router’s make and model. Typically, it will be under the “Advanced Settings” or “Firewall” sections. Next, look for the “Port Forwarding” or “Virtual Server” option.
- Add a new port forwarding rule: Click on the “Add” button or the “+” symbol to add a new port forwarding rule. Then, enter a name for the rule, such as “44158,” in the “Name” field.
- Enter the IP address of the device you want to forward the port to: In the “Internal IP Address” or “LAN IP” field, enter the IP address of the device on your network to which you want to forward the port. This may be a computer or a networked device to which you want to allow traffic.
- Enter the port number: In the “External Port” and “Internal Port” fields, enter “44158” to specify that you want to forward traffic on that port.
- Choose the protocol: Select the protocol that you want to use, either “TCP,” “UDP,” or “Both.”
- Save the changes: Once you have entered all the necessary information, click the “Save” or “Apply” button to save your changes.
- Test the connection: To verify that the port forwarding is working correctly, you can use an online port checking tool or a program that uses port 44158 to ensure the traffic is forwarded correctly.
- Facebook Ads to Get Followers! - December 27, 2024
- ClickUp vs. Slack - December 20, 2024
- Mastering E-Commerce Analytics: A Blueprint for Success


