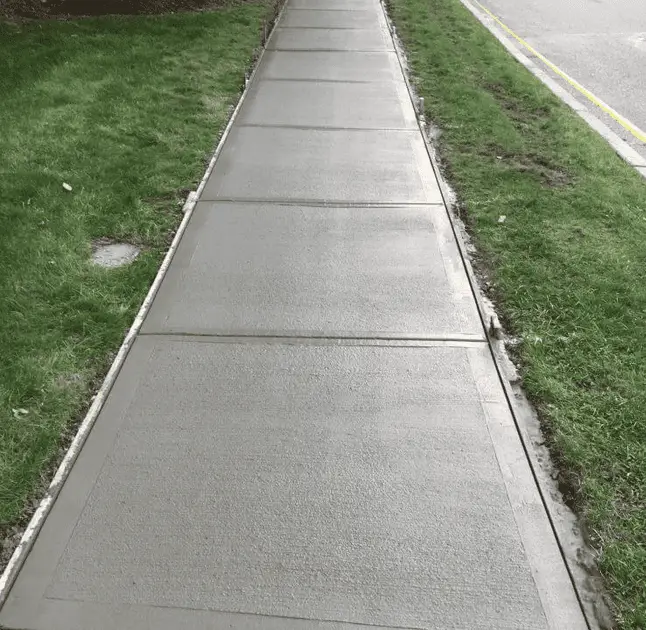
In the last article, we learned about Best Concrete Mix for Sidewalks. Concrete is a common material used for building sidewalks in residential and commercial areas. However, depending on weather conditions, foot traffic, and heavy loads, concrete sidewalks can develop cracks and become unsightly over time. Fortunately, repairing a concrete sidewalk can be a manageable DIY project with the right tools and materials.

How to Repair Concrete Sidewalks?
QUIKRETE® Concrete Resurfacer is a specialized product designed to repair and renew the surface of sound concrete that needs thin repairs. It blends Portland cement, sand, polymer modifiers, and other additives, providing a durable, shrinkage-compensated repair material.
Here’s an overview of how you can use QUIKRETE® Concrete Resurfacer to fix and repair sidewalks:
- Surface Preparation:
- Start by preparing the surface of the existing concrete sidewalk. Next, remove any loose or deteriorated concrete, dirt, debris, or coatings that may interfere with proper adhesion.
- Clean the surface thoroughly using a pressure washer or a stiff brush to ensure a clean and sound substrate.
- If there are any large cracks or deeply spalled areas, it’s recommended that they be filled with QUIKRETE® Concrete Crack Seal or a suitable repair product before proceeding.
- Mixing the Concrete Resurfacer:
- Follow the specific instructions provided by QUIKRETE® for mixing their Concrete Resurfacer.
- It would help to combine the dry Concrete Resurfacer powder with clean water in a mixing container or a concrete mixer.
- Mix the material until it reaches a workable consistency, ensuring all the dry powder is thoroughly blended with the water.
- Applying the Concrete Resurfacer:
- Moisten the existing concrete surface with water, but remove any standing water before applying the Concrete Resurfacer.
- Using a trowel or squeegee, apply a thin, even layer of the Concrete Resurfacer onto the prepared concrete surface. Work in small sections to ensure proper application and control.
- Spread and smooth the material, ensuring it fills voids or low spots and adheres well to the existing concrete.
- Applying the resurfacer at a thickness of around 1/8 to 1/4 inch is recommended.
- Finishing and Curing:
- After applying the Concrete Resurfacer, use a trowel, float, or broom to create the desired surface texture or finish.
- Pay attention to any specific finishing instructions provided by QUIKRETE® to achieve the desired results.
- Ensure the repaired surface is cured correctly according to the recommended curing time provided by the manufacturer. This may involve covering the repaired area with plastic sheeting or curing compounds.
- Post-Repair Maintenance:
- Once the repair is complete and the resurfaced area is fully cured, it’s essential to maintain the sidewalk properly.
- Regular cleaning and maintenance, such as sweeping, periodic pressure washing, and prompt repair of any new damage or cracks, will help extend the lifespan of the repaired sidewalk.
Always refer to the specific instructions provided by QUIKRETE® for their Concrete Resurfacer product. They may have specific recommendations and guidelines for application, curing, and maintenance. Following these instructions will help ensure the best results and a durable repair for your sidewalk.
Steps summary to repair concrete sidewalk
This article will look at how to repair concrete sidewalks step-by-step.
Step 1: Evaluate the condition of the sidewalk
Before starting the repair process, it is essential to review the condition of the concrete sidewalk to be repaired. First, check the extent of the damage, including the location, size, and depth of cracks. Next, identify areas with spalling or pitting where the concrete has crumbled or become rough. Also, note any areas where the concrete has lifted due to tree roots or other causes.
Step 2: Prepare the surface
The second step is to clean and prepare the surface to be repaired. Clear debris, dirt, and loose concrete using a wire brush, broom, or a high-pressure washer. Next, use a concrete patching compound to fill any potholes or dips. Next, use a diamond grinder to smooth any rough or uneven surface.
Step 3: Apply QUIKRETE® Concrete Resurfacer
In this step, the QUIKRETE® Concrete Resurfacer is mixed per the manufacturer’s instructions. Pour it onto the surface for repair and use a long-handled squeegee to spread it evenly. Ensure the resurfacer is applied in a thin, consistent layer of about 1/8 to 1/4 inches. Use a trowel to smooth the surface and feather the edges for more extensive repairs.
Step 4: Add Texture
Applying a non-slip textured finish to the concrete sidewalk is essential to prevent slips and falls. In this step, add texture using a broom, brush, or trowel to create the desired surface finish. Then, allow the surface to dry completely before walking or driving.
Step 5: Cure the surface
The final step is to allow the concrete surface to cure for at least 24 hours, ideally before use. Then, as the manufacturer advises, moisten the surface during curing by spraying water lightly to prevent rapid drying and cracking.
Conclusion
Repairing concrete sidewalks is essential to maintain their aesthetics and ensure safety for pedestrians and road users. Repairing a concrete sidewalk with the proper tools and materials can be a straightforward DIY project. However, if the damage is extensive, it is advisable to seek the services of a professional contractor. Remember to follow the manufacturer’s instructions when using QUIKRETE® Concrete Resurfacer to achieve a durable and long-lasting result.
- Facebook Ads to Get Followers! - December 27, 2024
- ClickUp vs. Slack - December 20, 2024
- Mastering E-Commerce Analytics: A Blueprint for Success


